本文共 5547 字,大约阅读时间需要 18 分钟。

You may be using Microsoft Excel to organize a mailing list neatly. However, when you get ready to print mailing labels, you’ll need to use mail merge to create them in Word from your Excel list. Here’s how.
您可能正在使用Microsoft Excel来整齐地组织邮件列表。 但是,当您准备打印邮件标签时,需要使用邮件合并功能从Excel列表中的Word中创建它们。 这是如何做。
第一步:准备您的邮件列表 (Step One: Prepare your Mailing List)
If you have already created a mailing list in Excel, then you can safely skip this test. If you haven’t created the list yet, despite Excel’s lack of the mailing label function, we still highly recommend you use Excel since it’s better for organizing and maintaining data than using a Word table.
如果您已经在Excel中创建了邮件列表,则可以安全地跳过此测试。 如果您还没有创建列表,尽管Excel缺少邮件标签功能,但我们仍然强烈建议您使用Excel,因为与使用Word表相比,它更适合组织和维护数据。
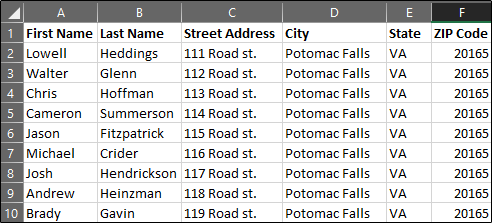
The first thing you need to do is create a column header respective to the data that goes in each column. Place those headers in the first row of each column.
您需要做的第一件事是创建与每个列中的数据相对应的列标题。 将这些标题放在每列的第一行中。
Which headers you include depends on which information you plan to use in the mailing labels. Titles are always nice, but it’s important that you know which title a person goes by before creating the labels. Also, if your list is for companies and not individual people, you can omit the “First Name” and “Last Name” header and just go with “Company Name” instead. To properly illustrate the steps, we’ll go with a personal mailing list in this example. Our list will include the following headers:
您包括哪些标题取决于您计划在邮件标签中使用的信息。 标题总是很不错,但是在创建标签之前,您必须知道一个人要经过哪个标题,这一点很重要。 此外,如果您的清单是针对公司而非个人的,则可以省略“名字”和“姓氏”标头,而只需使用“公司名”。 为了正确地说明这些步骤,在此示例中,我们将使用个人邮件列表。 我们的列表将包括以下标题:
- First Name 名字
- Last Name 姓
- Street Address 街道地址
- City 市
- State 州
- ZIP Code 邮政编码
This is the standard information you’ll find on mailing labels. You can even insert images in the mailing labels if you want, but that step would come later in Word.
这是您在邮件标签上可以找到的标准信息。 您甚至可以根据需要在邮件标签中插入图像,但是稍后将在Word中进行。
Once you’ve finished creating the headers, go ahead and input the data. Once you’re finished, your list should look something like this:
创建标题后,继续并输入数据。 完成后,您的列表应如下所示:
Go ahead and save your list and let’s head over to Microsoft Word.
继续并保存您的列表,然后转到Microsoft Word。
第二步:在Word中设置标签 (Step Two: Set Up Labels in Word)
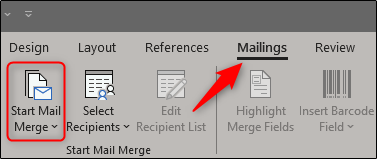
Open up a blank Word document. Next, head over to the “Mailings” tab and select “Start Mail Merge.”
打开一个空白的Word文档。 接下来,转到“邮件”标签,然后选择“开始邮件合并”。
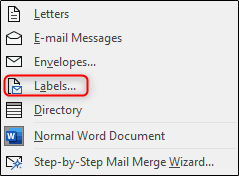
In the drop-down menu that appears, select “Labels.”
在出现的下拉菜单中,选择“标签”。
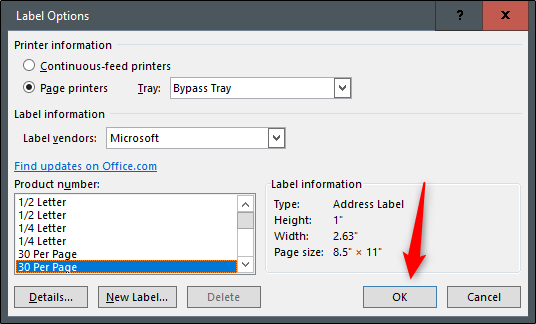
The “Label Options” window will appear. Here, you can select your label brand and product number. Once finished, click “OK.”
将出现“标签选项”窗口。 在这里,您可以选择标签的品牌和产品编号。 完成后,单击“确定”。
Your label outlines will now appear in Word.
您的标签轮廓现在将出现在Word中。

Note: If your label outlines aren’t showing, go to Design > Borders, and select “View Gridlines.”
注意:如果未显示标签轮廓,请转到“设计”>“边框”,然后选择“查看网格线”。
第三步:将工作表连接到Word的标签 (Step Three: Connect your Worksheet to Word’s Labels)
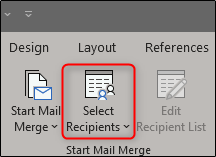
Before you can transfer the data from Excel to your labels in Word, you must connect the two. Back in the “Mailings” tab in the Word document, select the “Select Recipients” option.
必须先将两者连接,然后才能将数据从Excel传输到Word中的标签。 返回Word文档的“邮件”选项卡中,选择“选择收件人”选项。
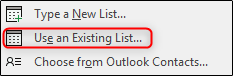
A drop-down menu will appear. Select “Use an Existing List.”
将会出现一个下拉菜单。 选择“使用现有列表”。
Windows File Explorer will appear. Use it to locate and select your mailing list file. With the file selected, click “Open.”
Windows文件资源管理器将出现。 使用它来查找和选择您的邮件列表文件。 选择文件后,单击“打开”。

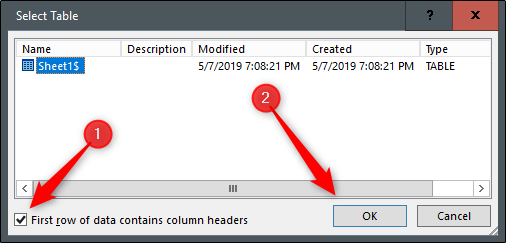
The “Select Table” window will appear. If you have multiple sheets in your workbook, they’ll appear here. Select the one containing your list. Make sure to enable the “First row of data contains column headers” option if it’s not already and then click “OK.”
将出现“选择表”窗口。 如果您的工作簿中有多个工作表,它们将显示在此处。 选择一个包含您的列表。 如果尚未启用“第一行数据包含列标题”选项,请确保启用该选项,然后单击“确定”。
Your labels are now connected with your worksheet.
您的标签现在已与您的工作表连接。
第四步:将邮件合并字段添加到标签 (Step Four: Add Mail Merge Fields to the Labels)
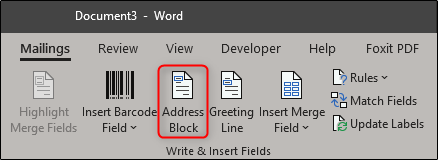
Now it’s time to add your mail merge fields in Word’s labels. Select the first label, switch to the “Mailings” tab, and then click “Address Block.”
现在是时候在Word的标签中添加邮件合并字段了。 选择第一个标签,切换到“邮件”选项卡,然后单击“地址阻止”。
In the “Insert Address Block” window that appears, click the “Match Fields” button.
在出现的“插入地址块”窗口中,单击“匹配字段”按钮。

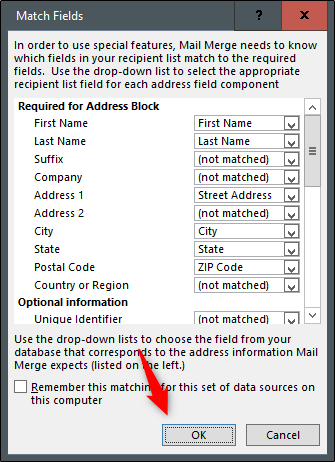
The “Match Fields” window will appear. In the “Required for Address Block” group, make sure each setting matches the column in your workbook. For example, “First Name” should match with “First Name,” and so on. Once you’ve confirmed everything is set properly, click “OK.”
出现“匹配字段”窗口。 在“地址块必需”组中,确保每个设置都与工作簿中的列匹配。 例如,“名字”应与“名字”匹配,依此类推。 确认所有设置均正确后,请点击“确定”。
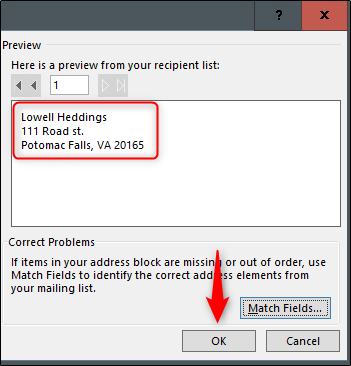
Back at the “Insert Address Block” window, check out the preview to make sure everything looks good and then click “OK.”
返回“插入地址块”窗口,检查预览以确保一切正常,然后单击“确定”。
<<AddressBlock>> will now appear in your first label.
<< AddressBlock >>现在将出现在您的第一个标签中。

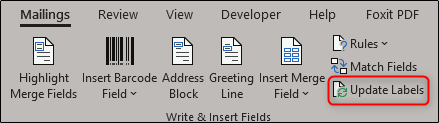
Head back over to the “Mailings” tab and then click “Update Labels.”
回到“邮件”标签,然后单击“更新标签”。
Once selected, <<AddressBlock>> should appear in every label.
选择后,<< AddressBlock >>应该出现在每个标签中。

Now, you’re now ready to perform the mail merge.
现在,您现在准备执行邮件合并。
第五步:执行邮件合并 (Step Five: Performing the Mail Merge)
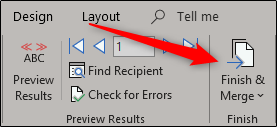
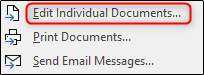
Now to watch the magic happen. On the “Mailings” tab, click “Finish & Merge.”
现在观看魔术发生。 在“邮件”选项卡上,单击“完成并合并”。
From the drop-down menu that appears, select “Edit Individual Documents.”
从出现的下拉菜单中,选择“编辑单个文档”。
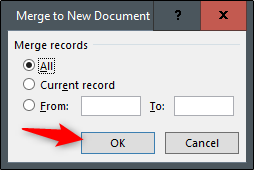
The “Merge to New Document” window will appear. Select “All” and then click “OK.”
出现“合并到新文档”窗口。 选择“全部”,然后单击“确定”。
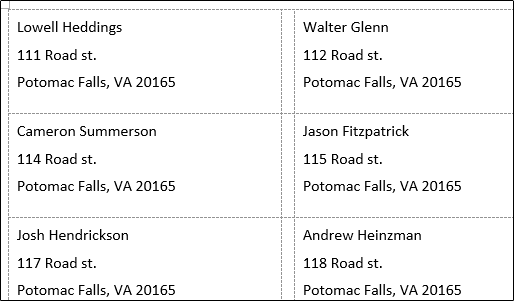
Your list from Excel will now be merged into the labels in Word.
Excel中的列表现在将合并到Word中的标签中。
All that’s left to do now is and !
现在剩下要做的就是并 !
翻译自:
转载地址:http://onzwd.baihongyu.com/